

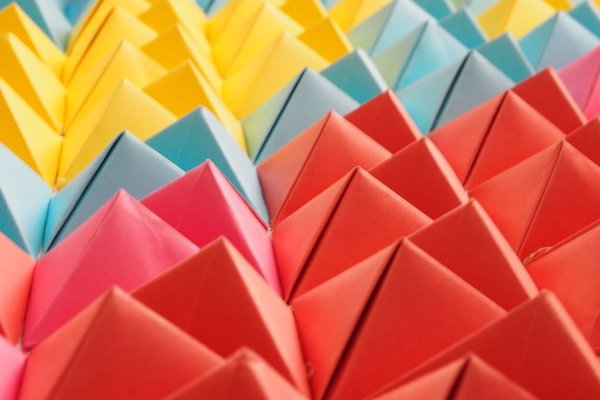
Modular origami patterns turn a simple fold into something far more ambitious. Instead of shaping one sheet into a finished model, you fold many identical pieces, called units or modules, and connect them to create a larger structure. The individual unit may be quick to make, yet the completed form can become a star, polyhedron, flower ball, or geometric sculpture with striking depth and symmetry.
For intermediate folders, this approach offers a satisfying shift in focus. Accuracy matters more than complicated crease sequences, and the challenge lies in repetition, planning, and assembly. As the final units slide into place, a pile of small folded papers suddenly becomes a coherent three-dimensional object.
How Modular Origami Patterns Work
Most modular origami patterns use a repeatable unit with pockets, tabs, flaps, or interlocking edges. One part of a unit is inserted into another, allowing the pieces to hold together through friction and tension. Some designs use only three or six units, while complex geometric origami may require 30, 60, 90, or several hundred.
The number of units usually reflects the geometry of the finished shape. A 30-unit model, for example, may organize its modules around the edges of an icosahedron. Understanding that hidden structure makes assembly easier because you are building repeated rings, points, or junctions according to a predictable system.
Units, Connections, and Locking Systems
In unit origami, the strength of the model depends on both the fold and the connection. A loose pocket can cause the structure to open, while a bulky tab may distort the angles. Each module should therefore be made in the same orientation, with consistent crease pressure and corner placement.
Many patterns become more stable as additional units are added. Early stages can feel fragile because there is not yet enough tension to lock the shape. Support the growing form with both hands rather than gripping one connection, which can pull a partially assembled section apart.
Choosing Paper for Modular Models
Paper selection affects the folding experience and the final appearance. Standard origami paper works well for medium-sized projects, especially when the units involve several layers. Thin paper produces cleaner pockets and reduces bulk, although extremely lightweight sheets may tear or lose tension during assembly.
For a first attempt at a new pattern, use paper that creases easily and is not too slippery. Squares between 5 and 10 centimetres are common, though the best size depends on the unit. Larger paper makes the sequence easier to study, while smaller paper creates a more refined finished sculpture.
Planning Colour Before You Fold
Colour placement can reveal or hide the geometry. One colour emphasizes shadow and form, while two or three colours can highlight rings, spirals, faces, or star points. Before folding dozens of units, check whether the pattern requires equal quantities, an alternating sequence, or a specific ratio.
Kusudama origami often uses decorative palettes because its spherical forms display repeated petals or floral sections. Mathematical models may benefit from contrasting colours that make the underlying polyhedron easier to read. Test a small section first; changing the palette after six units is easier than changing it after sixty.
Building Accurately and Efficiently
Repetition can introduce small inconsistencies. One useful method is to fold units in stages: make the first crease on every sheet, then the second crease on every sheet, and continue until the batch is complete. This assembly-line approach improves consistency and reduces accidental reversed folds.
Keep one correctly finished unit beside you as a reference. Check that each new piece has the same pockets and tabs facing the same direction. For patterns with left- and right-handed units, separate them into labelled groups. A single reversed module can interrupt the colour sequence or stop a ring from closing.
Use Geometry as an Assembly Guide
When a pattern begins to curve, count the units around each junction. If five points are meant to meet, maintain that rule throughout the model. If the instructions form triangular groups, look for repeating triangles rather than focusing only on individual tabs. Recognizing these relationships is a key skill in confident modular folding.
Do not force a connection that seems misaligned. Check whether the unit is inserted into the correct pocket and whether the surrounding modules follow the intended sequence. Because tension is distributed across many pieces, one incorrect connection can distort an entire section.
Popular Forms to Explore
Sonobe-based models are among the best-known examples of geometric origami. The basic Sonobe unit can be combined in different quantities to produce cubes, stellated forms, and polyhedra. Its clear tab-and-pocket system makes it an excellent foundation for learning structural assembly.
Kusudama origami offers a more decorative direction. Modern kusudama designs often combine folded flowers, cones, or petal-shaped modules into a sphere. Some versions are tied or glued, while purist designs rely entirely on interlocking folds. The result sits between paper craft and origami sculpture, with strong visual impact from repeated texture.
Stars and rings are also useful intermediate projects because their structure remains visible during construction. Once you can maintain symmetry in an open model, enclosed balls and polyhedra become less intimidating. Advanced folders can then explore curved assemblies or models that combine several different units.
Should You Use Glue?
Traditional modular origami is usually assembled without adhesive, and a well-designed model should hold through its locking system. Still, a tiny amount of glue can be practical for display pieces, very small modules, slick paper, or designs that will be handled frequently.
Try assembling the model dry first. If connections loosen, confirm that the folds are accurate before adding adhesive. When glue is necessary, apply it sparingly inside a pocket so it remains invisible. Too much moisture can wrinkle the paper and weaken the crisp geometric finish.
Frequently Asked Questions
What is the easiest modular origami pattern for an intermediate folder?
A basic Sonobe cube or small 12-unit Sonobe form is a strong starting point. The unit is straightforward, the locking method is easy to understand, and the geometry stays visible throughout assembly.
How many units should I fold before starting assembly?
For a familiar pattern, folding the full set first is efficient. For a new pattern, make six to ten units and test the connection before committing to the entire quantity. This can reveal reversed folds or unsuitable paper early.
Why does my modular model keep falling apart?
Common causes include shallow pockets, inconsistent unit size, incorrect insertion, or insufficient tension during the early assembly stage. Recheck the reference unit and support the whole structure while adding pieces.
Can modular origami patterns use rectangular paper?
Yes. Although many units begin with squares, some systems use rectangles, strips, or specially proportioned sheets. Follow the dimensions specified by the pattern because changing the ratio can alter the locking angles.
Bringing the Final Structure Together
The beauty of modular origami lies in transformation through repetition. No single unit looks especially complex, yet careful folding and controlled assembly produce a form that feels engineered. Start with geometry you can understand, choose paper that holds a crisp crease, and focus on consistency. As your confidence grows, larger unit counts and more intricate origami sculpture designs become less about endurance and more about rhythm, structure, and creative possibility.