
There’s something quietly magical about folding a flat sheet of paper and watching it transform into a crane, a flower, or even a tiny box. No glue. No scissors. Just a few careful creases and a bit of patience.
If you’ve ever searched for DIY origami projects step by step, you’re probably looking for more than instructions. You want the feeling that comes with making something beautiful out of almost nothing.
Origami isn’t just a craft. It’s a pause button. It’s focus, creativity, and a reminder that simple materials can lead to surprisingly intricate results. Whether you’re completely new or just a little rusty, these step-by-step ideas will help you ease into the art of paper folding and maybe fall in love with it along the way.
Why Origami Still Captivates Us
Origami has been practiced for centuries, but it feels timeless. There’s a reason people return to it again and again.
It doesn’t require expensive supplies. A square piece of paper is enough. It fits into busy lives—you can fold during a quiet evening, on a rainy afternoon, or while sitting at your kitchen table with a cup of tea. And perhaps most importantly, origami encourages patience. Each fold builds on the last. Rush it, and the shape won’t quite work. Slow down, and it comes together almost effortlessly.
That rhythm is part of the appeal of DIY origami projects step by step. You’re not just creating an object—you’re following a gentle process that rewards attention and care.
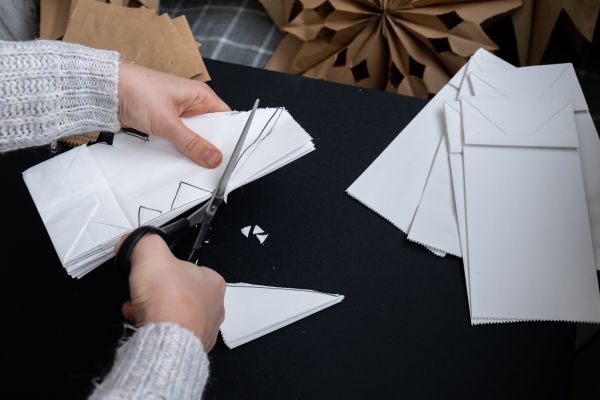
Getting Started with the Right Paper
Before diving into specific projects, it helps to understand your material. Traditional origami paper is thin and square, often colored on one side and white on the other. But you don’t need anything fancy.
Printer paper trimmed into a square works perfectly for beginners. Lighter paper is easier to crease cleanly. Thicker cardstock can be beautiful for final display pieces but may feel stubborn at first.
The key is crisp folds. Use your fingernail or the edge of a ruler to press down each crease firmly. Neat folds make even simple designs look polished.
Now, let’s move into a few classic and creative DIY origami projects step by step that are approachable and genuinely satisfying.
The Classic Origami Crane
The paper crane is perhaps the most iconic origami design. It looks delicate and complex, yet once you understand the sequence, it becomes almost meditative.
Start with a square piece of paper. Fold it diagonally into a triangle. Then fold it diagonally again into a smaller triangle. Open one flap and squash-fold it into a square shape. Repeat on the other side.
From there, fold the side edges inward to create a kite shape. Lift one bottom flap upward to form what will become the neck and tail. Repeat on the opposite side. Finally, fold down one thin section to create the crane’s head and gently pull the wings apart.
It sounds like a lot, but each fold builds logically from the previous one. The first crane might take time. The third will feel smoother. By the fifth, your hands almost know what to do before your mind catches up.
The Simple Origami Tulip
If the crane feels a bit ambitious, the origami tulip is a wonderfully friendly place to begin.
Begin with a square sheet. Fold it diagonally into a triangle. Fold the two corners of the triangle upward toward the top point, creating a diamond shape. Turn it over and gently blow into the small opening at the base to inflate the flower. Curl the petals outward slightly for a softer look.
Pair it with a simple folded stem—made by rolling or folding a rectangular strip of green paper—and you’ve created something that looks charming on a windowsill or desk.
This is one of those DIY origami projects step by step that feels instantly rewarding. It doesn’t demand perfection. Slightly uneven petals can even add character.
The Origami Paper Box
Practical origami is underrated. A small paper box can hold jewelry, paper clips, or tiny gifts. It’s surprisingly sturdy when folded correctly.
Start with a square sheet and fold it in half horizontally, then unfold. Fold it in half vertically and unfold again. Now you have a cross crease. Fold each corner into the center point, forming a smaller square.
Fold the top and bottom edges inward toward the center line. Unfold them, then fold the left and right edges inward and unfold again. You’ll see a grid forming. Lift two opposite sides upward and shape the box by folding the corners inward.
What’s satisfying here is the transformation. A flat sheet gradually rises into a three-dimensional object. It feels almost architectural.
Origami Heart for Thoughtful Touches
Sometimes you want something quick but meaningful. An origami heart fits perfectly into a note, a book, or even tucked into a lunch bag.
Fold a square sheet in half vertically. Unfold. Fold both top corners down to meet the center crease, forming a point. Flip the paper over and fold the bottom upward so it sits just below the top edge. Tuck the top corners slightly inward to round the heart shape.
It’s a small project, but it carries warmth. Among DIY origami projects step by step, this one often becomes a favorite because it blends creativity with sentiment.
Origami Butterfly for Decorative Flair
The butterfly is playful and expressive. It looks delicate but comes together quickly.
Start by folding the paper diagonally into a triangle. Fold the triangle in half again. Then fold the two outer corners upward slightly above the top edge. Flip the model over and fold the top point downward to secure the wings.
The result is light and airy. Make several in different colors and string them together for a simple wall decoration. Imperfect symmetry can actually make the butterfly feel more natural.
Tips for Clean and Precise Folding
The difference between a frustrating experience and an enjoyable one often comes down to small details.
Work on a flat, hard surface. Soft surfaces can cause uneven creases. Take your time aligning edges before pressing down. If a fold feels slightly off, it’s okay to gently unfold and adjust.
And here’s something people don’t say enough: your first few attempts might look messy. That’s normal. Origami rewards repetition. Muscle memory develops quietly in the background.
When exploring DIY origami projects step by step, think of each piece as practice rather than performance.
Making Origami a Relaxing Ritual
Origami isn’t only about the final shape. It’s about the space it creates.
Set aside twenty minutes without distractions. Choose calming music or enjoy silence. Focus on the texture of the paper and the sound of each crease. Notice how your breathing slows.
Many people turn to paper folding as a way to reduce stress. The structured steps guide your attention away from racing thoughts. Each fold becomes a small, achievable action.
That’s part of why DIY origami projects step by step continue to attract beginners. They offer both creativity and calm.
Expanding Your Skills Over Time
Once you feel comfortable with beginner models, you can gradually explore more complex designs. Modular origami, where multiple folded units interlock to form geometric shapes, opens up a whole new dimension.
Animals with detailed features, intricate stars, and layered flowers challenge your precision. But the foundation remains the same: accurate folds and patience.
There’s no rush. Origami is a long conversation between your hands and the paper. Each project teaches something subtle—how to read crease patterns, how to anticipate the next fold, how to adjust when things don’t align perfectly.
Teaching Origami to Kids and Friends
Origami is surprisingly social. Folding together around a table creates quiet connection. It encourages conversation without pressure.
Children especially enjoy watching paper change shape in their hands. Start with very simple designs like paper boats or hats. The sense of accomplishment builds quickly.
Sharing DIY origami projects step by step also reinforces your own understanding. Explaining folds out loud clarifies the sequence in your mind.
The Beauty of Imperfection
One of the quiet lessons of origami is acceptance. Not every crane will stand perfectly. Not every box will be crisp. Sometimes the paper tears.
And yet, those small imperfections give character. They remind you that something real was made by human hands.
In a world filled with mass-produced objects, a slightly crooked paper flower feels personal. It carries the story of its making.
A Creative Practice That Stays with You
The charm of DIY origami projects step by step lies in their simplicity. No elaborate setup. No complicated tools. Just paper, intention, and a willingness to try.
You might begin with a crane or a heart. Over time, you may find yourself folding without instructions, experimenting with new shapes, or creating decorations for holidays and celebrations.
Origami teaches patience. It encourages focus. And perhaps most importantly, it proves that something beautiful can emerge from something ordinary.
So the next time you have a quiet moment and a spare sheet of paper, fold it. Follow the creases. Let the shape reveal itself gradually.
In that small act of creation, you might discover that the real project isn’t just the paper—it’s the calm, creativity, and satisfaction that unfold along with it.