

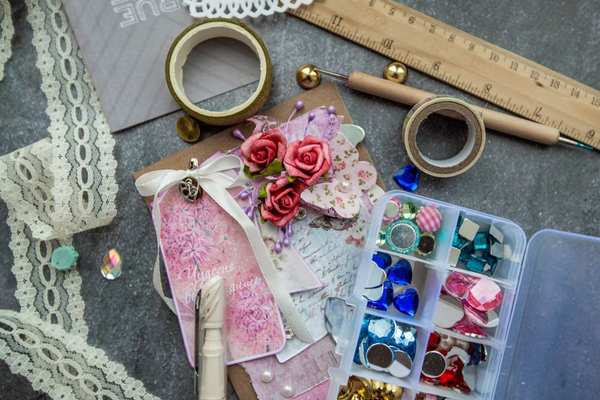
Card making can look expensive when you first browse a craft shop. Shelves are filled with stamps, dies, inks, specialty papers, embossing powders, tools and decorative extras. The good news is that beginners need far less. A small, well-chosen kit is enough to make attractive cards and learn the techniques that matter most.
The smartest card making supplies list starts with materials that affect every project: good cardstock, accurate cutting tools, reliable adhesive and a few decorating options. Once you know which styles you enjoy, you can add specialty supplies without wasting money on products that sit unused.
Start with quality cardstock
Cardstock forms the structure of the card, so it is worth choosing carefully. Ordinary printer paper is too thin for most card bases and can buckle under glue, ink or embellishments.
For folded card bases, cardstock around 250 to 300 gsm is a practical starting range. Lighter sheets around 160 to 220 gsm work well for decorative layers, printed panels and die-cut pieces. Exact weights vary by brand, so stiffness and finish matter as much as the number on the pack.
Useful cardstock types include smooth white, cream, coloured matte cardstock and textured cardstock. Beginners can start with white or cream for bases and add a small pack of coordinating colours rather than buying dozens of individual shades.
Buy a paper trimmer before decorative tools
A paper trimmer is one of the most useful card making tools because straight, accurate cuts immediately make handmade cards look neater. Choose one with clear measurements and a blade or cutting arm that feels stable.
Scissors are still essential for ribbon, small shapes and loose threads, but they are harder to use for perfectly straight panels. A precision craft knife and cutting mat can be added later if you enjoy detailed paper cutting.
A scoring tool makes cleaner folds
Scoring creates a shallow groove before cardstock is folded. This helps produce a crisp fold and reduces cracking, especially on heavier card.
A scoring board is convenient, but beginners can also use a bone folder with a ruler and suitable surface. A bone folder is inexpensive and useful for both creasing and pressing glued layers firmly into place.
Choose the right adhesive for the job
There is no single best glue for cards because different materials need different adhesives. For most paper layers, a strong double-sided tape or paper-safe liquid glue is enough.
Double-sided tape is clean and fast for large flat panels. Liquid craft glue gives you a few seconds to reposition a layer before it sets, which helps when alignment is difficult. Use it sparingly because too much moisture can warp paper.
Foam tape or foam squares are useful when you want to raise a sentiment or decorative element. Beginners do not need every adhesive type immediately; one reliable tape, one liquid glue and a small pack of foam pads cover most early projects.
Add simple measuring tools
A ruler, pencil and good eraser are basic but valuable. If you often work with exact borders, a ruler marked clearly in millimetres makes layering easier.
For example, if your card base measures 105 by 148 mm, cut a coloured panel slightly smaller to leave an even white border. Learning to measure simple layers will improve the finish of your cards more than buying extra embellishments.
Keep your first decorative supplies simple
Once the basic tools are covered, choose a few supplies that change the look of a card without creating a huge collection. Patterned paper is a good starting point because small pads often contain coordinating designs.
Other useful beginner craft supplies include sentiment stickers, twine or narrow ribbon, adhesive gems and flat embellishments. Flat decorations are easier to post than bulky flowers or thick charms and usually need less specialised glue.
Stamps and ink are useful but optional
Stamps are popular because one design can be reused many times. Clear stamps normally require an acrylic block, while mounted rubber stamps are ready to use.
If you want to try stamping, begin with one versatile black ink pad and a small sentiment set covering occasions such as birthdays, thank-you cards and congratulations. Check that the ink suits any colouring method you plan to use later.
What about punches and die-cutting machines?
Hand punches can be useful for circles, hearts or labels, but they are optional at the beginning. A manual die-cutting machine offers far more possibilities, yet it adds significant cost and storage needs.
It is usually better to make several cards with basic cutting tools before buying a machine. If layered shapes and intricate paper cuts become central to your style, a die-cutting system becomes a more sensible investment.
Markers, pencils and colouring supplies
You only need colouring tools if your designs require them. Coloured pencils are affordable and forgiving. Water-based markers are useful for simple colouring and lettering. Alcohol markers can create smooth blends but cost more and may bleed through thin paper.
Beginners who enjoy stamped images should start with a small colour palette instead of a huge marker set. A handful of coordinated colours is enough to learn blending and shading.
A realistic beginner starter kit
If you want to begin without overspending, start with heavyweight white cardstock for bases, a small pack of coloured cardstock, a paper trimmer, scissors, ruler, bone folder, double-sided tape, liquid paper glue, foam pads and one or two simple decorative supplies.
That kit is enough to make layered birthday cards, thank-you cards, simple wedding cards and seasonal designs. Add stamps, inks, punches or specialist tools only when a project gives you a clear reason to buy them.
Frequently asked questions
What cardstock weight is best for handmade cards?
For card bases, around 250 to 300 gsm is a useful starting range because it provides enough stiffness for most folded cards. Lighter cardstock can be used for decorative layers and inserts.
Do beginners need a die-cutting machine?
No. A paper trimmer, scissors and basic decorative supplies are enough to make many attractive cards. A die-cutting machine is worth considering later if you frequently want intricate shapes or layered dies.
Is liquid glue or double-sided tape better?
Both are useful. Double-sided tape is clean and immediate, while liquid glue allows a little repositioning before it dries. Many card makers keep both because each suits different tasks.
What should I avoid buying at the beginning?
Avoid large colour collections, expensive machines or highly specialised tools before you know which techniques you enjoy. Start with versatile supplies that work across many card styles.
Build your kit around the cards you actually make
The best beginner supply collection is not the biggest one. Good cardstock, accurate cutting, clean folds and dependable adhesive will improve almost every card you make. Decorative products should come later, guided by real projects rather than impulse purchases.
Start small, make several cards, and notice which tools would genuinely make the next project easier. That approach keeps the hobby affordable and helps you develop your own style naturally. Useful next topics include choosing cardstock for handmade cards, beginner card layouts and simple stamping techniques.