
If you’ve ever wondered how to crochet a hat, you’re not alone. Hats are one of the most popular crochet projects for beginners and experienced makers alike. They’re practical, customizable, and—let’s be real—who doesn’t love showing off a handmade accessory? Whether you want something cozy for winter, a lightweight beanie for cool evenings, or even a stylish fashion statement, learning how to crochet a hat is one skill that will stick with you for life.
Why Learn How to Crochet a Hat?
The thing is, crochet isn’t just about making cute pieces; it’s also about relaxation. Crocheting a hat can be meditative, giving you a sense of rhythm and calm while your hands keep busy. Plus, hats make amazing gifts. They’re quick enough that you won’t feel like you’re signing up for a six-month project, but they’re personal enough to really mean something to the person receiving it. You get to choose the yarn, the color, the size—it’s your chance to be creative and practical at the same time.
And let’s not forget: buying hats can get expensive, especially when you’re looking at trendy designs. But when you know how to crochet a hat, you’re in control of style without draining your wallet.
What You’ll Need Before You Start
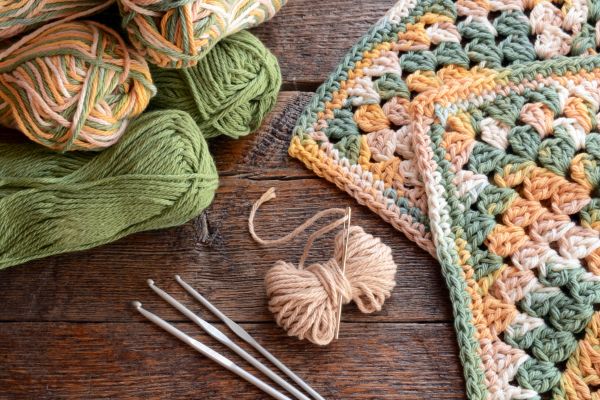
Before diving into how to crochet a hat, you need to gather a few basic supplies. Luckily, it doesn’t take much. A ball of yarn, a crochet hook, scissors, and a yarn needle usually cover it. Choose yarn that matches the type of hat you’re going for. Thicker yarn makes warm, chunky beanies, while lighter yarn is great for slouchy or breathable hats.
If you’re new to crochet, stick with a medium-weight yarn and a hook size recommended on the yarn label. Trust me, starting simple makes the process smoother, and you’ll pick up confidence way faster.
Understanding the Basics
Before you even stitch your first loop, you’ll want to know the basics of crochet. Don’t worry, it’s not as intimidating as it sounds. When learning how to crochet a hat, most patterns use stitches like the chain, single crochet, double crochet, and slip stitch. These stitches are like the alphabet of crochet—once you know them, you can “spell out” anything from hats to blankets.
Think of your hat in two possible construction styles: working in rounds from the top down, or creating a rectangle and stitching it together into a cylinder. Both methods work, but crocheting in rounds is usually easier for beginners because it creates that seamless, polished look right from the start.
Starting the Hat
Alright, let’s get into it. The classic way to begin crocheting a hat is with what’s called a “magic circle.” Don’t worry, it’s not actual magic—it’s just a loop you create to anchor your stitches. Into this loop, you’ll crochet a set number of stitches (usually double crochets) and then pull the circle tight. Boom—the crown of your hat is born.
From there, you keep working in rounds. Each round, you’ll add more stitches until the crown is wide enough to sit comfortably on top of your head. If you’ve ever tried on a hat that feels too tight or too loose, you’ll understand why this step is crucial. Getting the sizing right at this stage makes the whole project a lot smoother.
Building the Body of the Hat
Once you’ve got the crown sorted, the next step in learning how to crochet a hat is building the body. This part is fun because you can start playing with textures and stitch variations. Want a tight, warm beanie? Stick with single crochet stitches. Prefer something a bit airy and slouchy? Try mixing in double crochets or even fancy stitches like puff or shell stitches.
The body of the hat is essentially a tube. You just keep crocheting in rounds without adding extra stitches. This is the part where you can relax into the rhythm, maybe put on a podcast or your favorite playlist, and just let your hands do the work.
Finishing the Hat
When your hat has reached the length you want, it’s time to finish it off. Most hats look best with a simple band at the bottom. You can switch to a tighter stitch, like single crochet or half double crochet, to create that snug edge that keeps the hat from slipping.
If you’re feeling fancy, this is also where you can add ribbing by alternating front and back post stitches. Ribbing gives that stretchy, professional look—kind of like store-bought hats, but better because you made it yourself.
And of course, no tutorial on how to crochet a hat would be complete without mentioning pom-poms. Whether you buy one, make one with yarn scraps, or even go for faux fur, a pom-pom on top adds instant charm.
Troubleshooting Common Problems
Even seasoned crocheters mess up sometimes, so don’t beat yourself up if your first hat isn’t perfect. Maybe your hat comes out too tight—just try a bigger hook size next time. If it’s too loose, you probably need fewer stitches in the crown. Uneven stitches? That’s normal for beginners; it evens out with practice.
The key thing here: don’t give up. Each hat you make will look better than the last, and pretty soon, you’ll be able to whip one up without even looking at a pattern.
Taking It Further
Once you master the basics of how to crochet a hat, the possibilities explode. You can experiment with stripes, color blocking, textured stitches, or even earflaps for extra warmth. Crochet also allows you to customize sizing easily, so you can make hats for kids, adults, or anyone in between.
Want to turn this hobby into something bigger? Handmade crochet hats are popular at craft fairs and online shops. They’re also a great way to give back—many charities accept handmade hats for people in need.
Final Thoughts
So, there you have it: a complete guide on how to crochet a hat, from start to finish. It’s a project that’s approachable, fun, and endlessly customizable. The thing about crochet is that it gets better the more you do it. Every stitch teaches you something new, every finished hat gives you a little more confidence.
If you’ve been thinking about picking up a hook and some yarn, let this be your sign. Grab your supplies, put on some good music, and start stitching. By the time you finish your first hat, you’ll wonder why you didn’t start sooner. And hey—once you know how to crochet a hat, you’ll never be stuck buying boring, mass-produced headwear again. Instead, you’ll have something handmade, unique, and totally yours.